Here is an article I wrote
for an online magazine recently hope you find it useful (there is a little bit
of repetition in there sorry in advance)
Looking through the rain
smeared window of your local climbing wall, sipping a latte after another heavy
plastic pulling session. You’d be forgiven for putting your aspirations of
gracefully gliding over rock on hold for a bit, but don’t put it off all
together!
While most of the crags in
the UK
Tony’s top five tips for
climbing outside;
Racking:
1. Orientation of kit on the harness
Now this is a subject that is
always close to peoples hart, usually because when it goes wrong you’re
probably doing your best Elvis impression, while staring into a crack, holding
the wrong piece of gear in your hand with no idea where the bit you need is.
Sometimes the soundtrack to this scene is your belayer giving you directions
around your harness with your free hand to find what you’re looking for.
I find It useful to put my
protection (nut’s, cams ect) on the front loops of the harness, starting with
the smallest pieces first getting bigger the further around your hips you go.
This means you can usually see what your looking for by glancing down and by
putting the smaller stuff at the front the bigger stuff less likely to get in
your way when moving about. Also if you have any monster kit (really big cams
or hex’s) stick them right around the back out of the way.
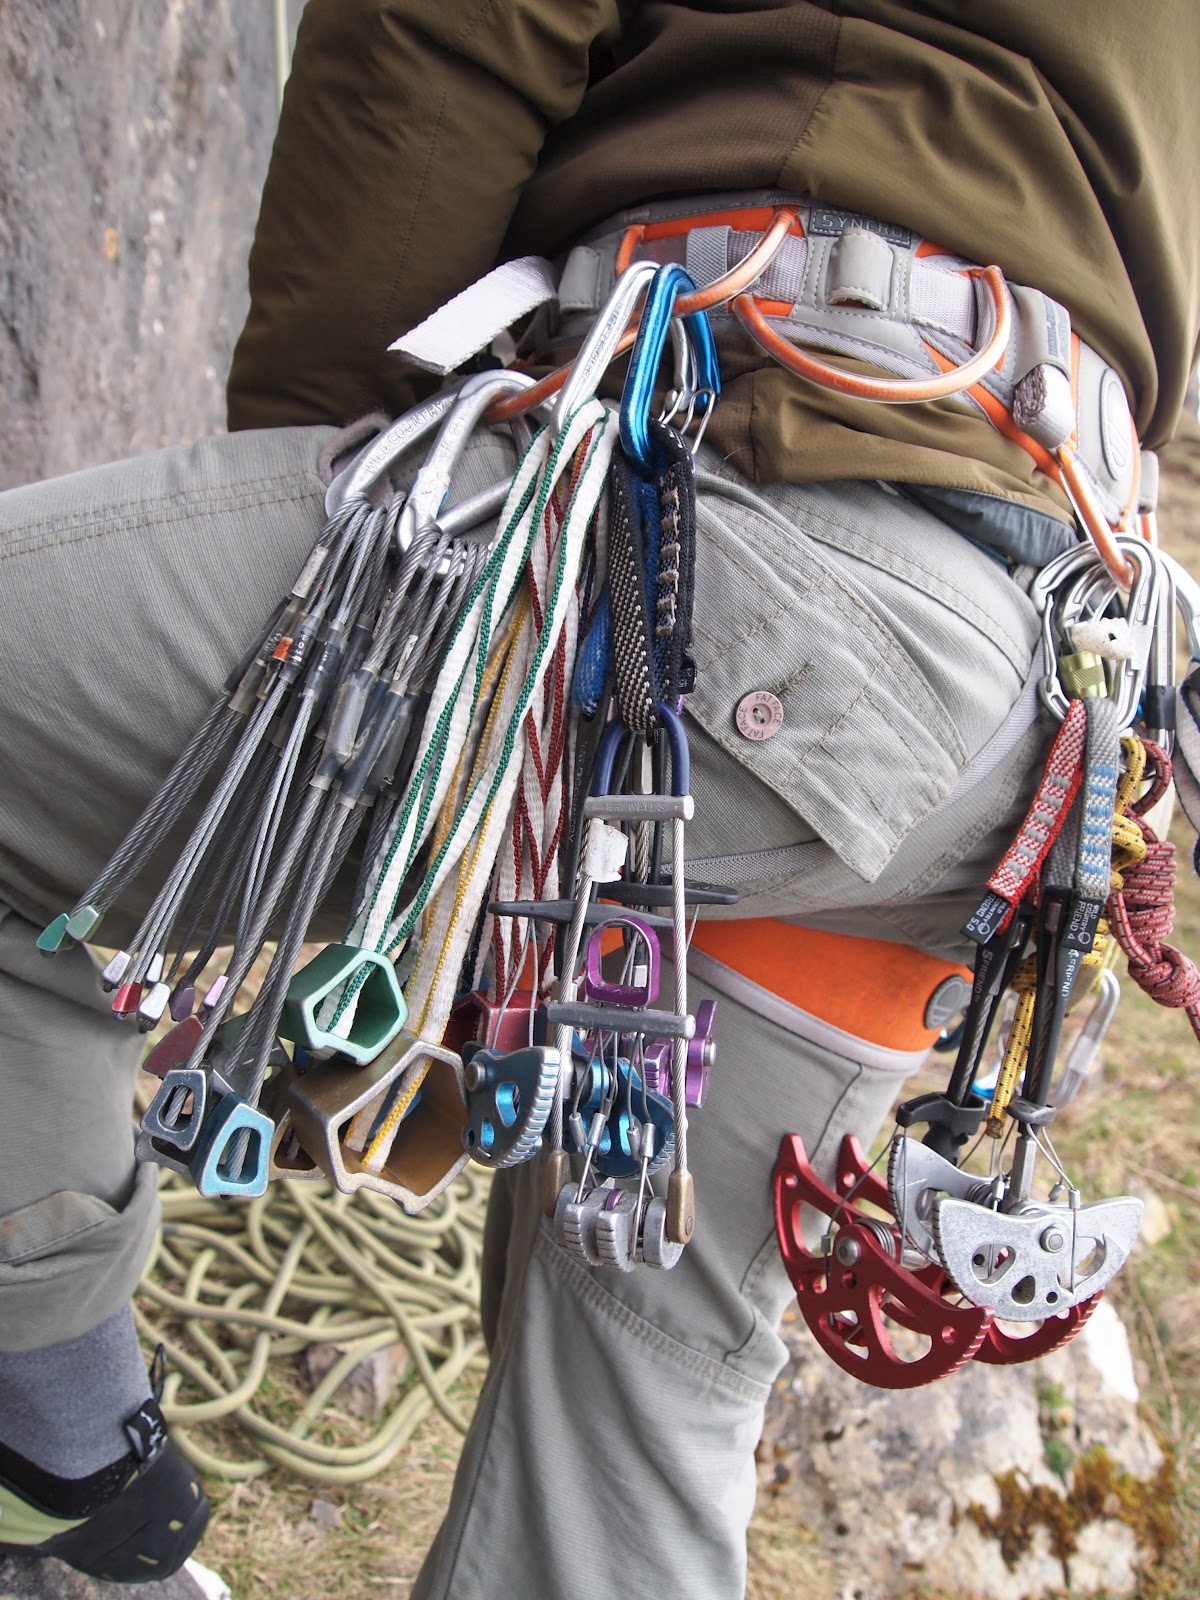
Then put your extenders on
your back loops, as these are a bit easier to sort through by feel. Ill stick
my longest ones furthest back getting down to my smallest at the front, this
minimises the chances of any cheeky bits of protection getting tangled around
the longer sling style extenders.

Lastly all your bits and
pieces like you belay device nut key, and prussic’s right round the back out of
the way
2. Racking
Nuts
Heading off in the vertical world is
always a gamble of efficiency do you go light and fast and run the risk of not
having the crucial bit of kit to see you through the crux, or do you take the
kitchen sink and struggle to get of the floor? With the majority of decent
length trad pitches, I find it useful to have two sets of nuts (DMM wallnuts
are my weapon of choice).

Split the nuts in to four sets, two
sets of large and two sets of small. And rack one large and one small set on
each side of your harness, this will enable you to do a number of things. If
you were to drop a set of crucial sized nuts in to oblivion or can’t get at the
set you need then all is not lost simply reach for the set on the other side.


Plus if you clip the nuts in towards
yourself and you need to replace a nut on the rack then all you need to do is
rotate the crab on your harness, this will put the crab in the best position to
re-clip the nut. All this can be done one handed!
3. Helmets:
Now, I know your all big boys
and girls, and can think for yourselves weather or not you want to climb with a
helmet on, and I wouldn’t have it any other way! However I’ve notice that. When
heading out to the crag people often only associate helmet wearing as safety
while climbing…. Your helmet is designed to deflect rock fall from above, not
to protect you from a reverse penguin dive of the crag at half height. So on
arriving at the crag (especially if you walk to the bottom) it’s worth thinking
about the following:
·
How loose does
the cliff look
·
Can I see the top
and how does that look
·
Are there people
climbing above me while I gear up, because a number 9 hex from 30m is not best
caught with your naked cranium, nor is anything else they may nudge off.
·
Is there a safe
area near by where I can sort my stuff out (I don’t mean a police station, just
somewhere where the chances of something landing on your is as small as you can
make it) sometimes at steep crags this is right at the base.
·
Are there
wildlife (sheep ect) wondering the ledges above nonchalantly kick stuff off.
It takes seconds to do and
could really make a difference to your day.
4. Harness:
A harness is a harness is a
harness right? Sort of, well no not really, sizes and colours aside. There are
some things to think about when heading out of the climbing gym:
·
Gear loops obvious one when you think about it, some sport
climbing harnesses only have two gear loops which is ideal for carrying the
hand full of extenders needed while climbing indoors or at a sports crag, but
if your going for the kitchen sink approach to trad climbing then you will need
to get more space on your harness. There are trad specific harnesses on the
market that have three loops on each hip and one around the back (but just
because you have all this space it dose not mean you need to fill it!)
·
Adjustability
when and where are you going to
be climbing outside? One trip to Gower once a summer, or all year around
chasing the snow line on mountain crags? If it’s the latter you may want to
invest in a harness with adjustable leg loops, to allow for the change in “leg
girth” as a result of putting on all your winter layers (not to mention the
insulation gained from the odd Christmas dinner or two).
·
Width of
waist and leg loops often seems
trivial when stood in the climbing shop trying to match the colour with you
belay device, but if you intend on spending hours sitting in it on hanging
belays with the ocean angrily nipping at you heels, then getting a harness that
has waist and leg loops that are as thin as chickening wire will probably
result in you enjoying the day considerably less. Not to mention probably
building an impressive hatred of your climbing partner for climbing so slow!
5. Placing protection:
Shaking on your tip toes, dry
mouthed, tears in your eyes, trying to stuff your nuts in to any crack within
arms reach is a sure fire way to get yourself in trouble!
Take a minute to look up the
route before you start and see what’s up there:
·
Are you following
a crack line, if so what size nuts or cams does it look like you’re going to
need? When you get there make a note of weather you guessed right or were they
bigger or smaller than you first thought.
·
Are there trees
on the route that you can put slings around? Over time you will become pretty
good at spotting gear from the ground.
·
Are there obvious
places to stand comfortably where you can get gear in?
When you’re on the route:
·
Are you in the
most comfortable place to get gear in, there’s nothing worse than looking like
you’ve just come 1st in the Vegas Elvis impersonation championships
while placing a runner only to look and find the hand hold of your dreams is
just above your head!
·
How much contact
does it make with the rock? When placing protection you want to insure that
it’s in as deep as reasonably possible and that the entire surface of the
protection is touching the rock. This is a subject in its self and will be
covered in a later article.
So there you have it some
things I’ve found useful while out climbing, I hope they help get you started.
www.welshadventures.com